
Patbingsu (Shaved Ice with Sweet Red Beans)
Bingsu is a Korean shaved ice treat. You can easily make a quick version with canned red beans, but the sweet red beans are easy to make at home. Either way, it will certainly cool you body down on hot summer days.
Ingredients
For patbingsu (per serving)
- 1 bowl shaved ice or milk ice
- 2 or 3 tablespoons sweetened red beans (pat, 팥), aka adzuki beans canned or from scratch
- 2 tablespoons condensed milk
- a few sweet rice cake pieces (injeolmi, 인절미), aka mochi store-bought or from scratch
Optional toppings
- Fruits, nuts, green tea ice cream, cookies, misugaru, green tea poweer, etc.
For the red beans
- 1 pound dried pat (팥, aka adzuki beans) about 2 cups
- 1/2 teaspoon salt
- ⅓ cup of sugar adjust to taste
- ⅓ cup of honey
For the rice cake
- 1 cup sweet rice powder (chapssal garu, 찹쌀가루)
- 2 tablespoons sugar
- 1/4 teaspoon salt
- 3/4 cup water
- 2 tablespoons corn starch or roasted soybean powder for dusting - optional You can wet everything with water so rice cake won't stick instead.
Instructions
Assembling bingsu:
- Before shaving the ice, make sure all the ingredients are cold. It also helps if you keep the serving bowls in the freezer for 10 minutes. Shave the ice in an ice shaver or in a blender or food processor.

- Add 2 to 3 tablespoons of the red beans. Drizzle with a tablespoon or two of condensed milk. Top it with a few rice cake pieces and your favorite fruit pieces, ice cream, and/or any other desired toppings.

For the red beans:
- Discard broken or rotten beans and rinse the beans. In a large pot, add the beans with 4 cups of water. Bring it to a boil, uncovered, over medium high heat. Reduce the heat to medium and boil for 5 minutes.

- Drain the beans.

- Return the beans to the pot with 8 cups of fresh water. Bring it to a boil. Cover, and simmer over medium low heat for about 1 hour, until the beans are nicely soft. Gently stir occasionally to make sure the beans are not sticking at the bottom. Add more water if needed.

- Gently stir in the salt, sugar and honey. Continue to simmer, uncovered this time, for about 10 minutes, gently stirring occasionally. Add more water if necessary. The beans should be liquidy. Most of the liquid will be soaked up by the beans even after being cooked.

- Transfer to a container and cool. Keep it in the fridge up to a week, or in the freezer for a few weeks. Thin it with cold water, if you want, when ready to use it again.
For the rice cake:
- Combine the sweet rice powder, sugar and salt. Mix well with a whisk.
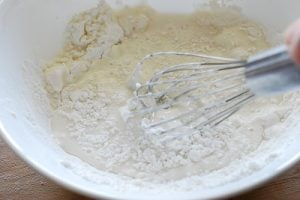
- Add water and mix well again.

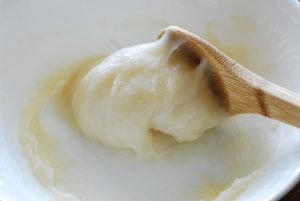
- Cover with ceramic wrap. Microwave for 2 minutes. Carefully open and flip the rice cake upside down and mix a couple of times. Microwave for another minute and check if the rice powder is entirely translucent. Microwave a little more (30 seconds) if needed.

- Remove from the microwave and let it sit for 5 minutes. Knead well with a wooden spoon for 2 to 3 minutes for a chewier rice cake.
- You can wet your hand and the cutting board, and turn the rice cake out on a wet cutting board. OR: Dust the cutting board with a tablespoon of cornstarch or roasted soybean powder. Flatten it with your hands into a rectangle.

- Cut into 1/2 to 3/4- inch strips. Wet the knife with water. Cut each strip into 3/4 inch cubes. Lightly dust the cut parts of the rice cake pieces with the cornstarch to prevent from sticking, if desired. You can freeze leftover rice cakes.

Notes
To cook azuki beans in the Instant Pot, boil the beans with 4 cups of water on the Saute function for 5 min after coming to a boil. Drain off the water, and add 6 cups of fresh water. Cook on Manual High for 20 minutes. Release after 10 min. Add the salt, sugar, and honey and cook on Saute for 3 to 4 minutes, gently stirring.